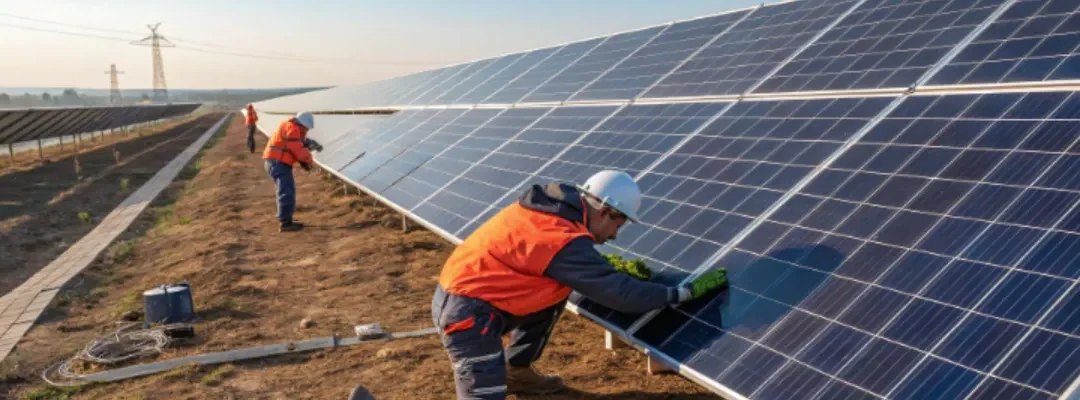
If your solar plant output is falling month by month—or you feel like “it used to generate more earlier”—there’s usually a clear reason behind it. The good news is: many issues can be found early with simple checks before they turn into bigger losses.
This blog explains the most common causes of low solar plant generation in a way that’s easy to understand, along with what to check first.
First, how do you know your solar plant is underperforming?
You may be underperforming if you notice:
Your monthly units (kWh) are lower than the same month last year
Inverters show frequent trips or long downtime
You see mismatch between inverters/strings
Your O&M team keeps “fixing small issues” but output doesn’t improve
Before jumping to conclusions, compare: This month vs same month last year Sunny days output vs earlier sunny days output Inverter-wise generation (which inverter is lagging)
12 Common Causes of Underperformance (Simple Explanation + Checks)
1) Panels are dirty (dust, bird droppings, leaves)
Even a small layer of dust can reduce output. What to check:
Are panels visibly dusty or patchy dirty?
Is cleaning happening regularly and properly?
Quick fix: Better cleaning schedule + correct method (avoid hard water marks).
2) Shadow falling on panels
A small shadow from a tree, pipe, wall, or nearby structure can reduce generation. What to check:
Without proper monitoring, problems stay hidden and losses grow. What to check:
Do you get inverter-wise and string-wise data?
Are alarms being noticed and responded quickly?
Fix: Upgrade monitoring and set alert response process.
What to Check First
If output is low, start with these steps:
Compare generation with last year (same month)
Check inverter alarms and downtime hours
Inspect cleaning and shadow issues
Check for hotspots / burnt connectors
Verify combiner box fuses and SPD health
Check IR and earthing health (trained technician)
This gives fast clarity on whether the issue is:
cleaning/shading
electrical faults
inverter/grid issues
aging equipment needing upgrades
When is it time to think beyond repairs?
If the same problems keep coming back and generation continues to drop even after maintenance, it may be time to consider:
inverter upgrade
module replacement
DC redesign / string balancing
monitoring upgrade
(These are often part of a repowering plan, but the first step is always diagnosis.)
FAQs
Why is my solar plant generating less electricity? Most common reasons are dust, shading, inverter trips, loose connectors, and DC losses.
How can I increase my solar plant output? Start with cleaning, shading removal, checking inverter downtime, fixing DC connector issues, and improving monitoring.
What causes inverter tripping in solar plants? Common reasons include grid voltage problems, insulation faults, overheating, DC imbalance, and component aging.
How do I know if my solar panels are damaged? Visible cracks/burn marks and hotspots found in thermal scanning are strong indicators.
If your solar plant is generating less power or facing frequent breakdowns, you may hear two common terms: revamping and repowering. Many plant owners get confused because both sound similar.
This blog explains the difference in simple words, and helps you decide which option is right—without getting too technical.
What is Revamping?
Revamping means repairing and restoring your solar plant so it performs closer to how it originally worked.
Think of it like repairing a machine:
fixing loose connections
replacing damaged cables
changing failed parts like fuses, SPDs, connectors
improving cleaning, tightening, and safety checks
Revamping is best when your plant is still healthy, but small issues are reducing output.
What is Repowering?
Repowering means upgrading the plant using newer and better components to improve performance and extend life.
It may include:
replacing old solar panels with higher efficiency panels
replacing old inverters with new models
redesigning strings to match new panel/inverter specs
upgrading monitoring/SCADA
strengthening or correcting mounting structures
Repowering is best when the plant is old, underperforming consistently, or parts are outdated.
Quick Difference
Revamping = Fix and Restore
Repowering = Upgrade and Improve
Revamping improves the plant by correcting faults. Repowering improves the plant by modernizing major equipment.
When to Choose Revamping
Choose revamping if:
output reduced due to dust, shading, or maintenance gaps
inverters are mostly fine, but small faults occur
DC connectors/cables have local damage
combiner box issues like fuse/SPD failures are common
earthing or insulation issues need correction
structure has minor rust or loose fasteners but still strong
Revamping is usually enough when the plant has repairable issues, not major aging.
When to Choose Repowering
Choose repowering if:
generation is reducing every year even after proper maintenance
inverter trips are frequent and spare parts are not available
a large number of panels have hotspots/cracks/yellowing
strings are mismatched and performance losses are constant
monitoring is weak and faults stay hidden
plant downtime is high and repairs repeat frequently
the plant is old and technology is outdated
Repowering is usually required when the plant needs big upgrades rather than repeated fixes.
Cost Factors: What Usually Makes the Price Go Up?
Instead of giving fixed pricing, here are the main cost drivers that affect both revamping and repowering:
Revamping Cost Depends On:
number of faulty strings / connectors / cables
combiner box component replacements
earthing and insulation correction scope
cleaning frequency and site conditions
safety improvements needed
Repowering Cost Depends On:
whether modules are replaced (biggest cost driver)
inverter replacement requirement
DC redesign or re-cabling needed
structure changes to match new modules
monitoring/SCADA upgrades
how much shutdown time is needed
Downtime Planning
Many owners worry: “If I upgrade, will my plant stop for many days?”
Revamping Downtime
Usually lower
Can often be done in small blocks
Suitable for quick improvements
Repowering Downtime
Higher than revamping
Needs better planning
Can still be done in phases (row-wise or inverter-wise) in many cases
Best practice: plan major works during lower-generation periods (site-dependent).
What Results Can You Expect?
Revamping Can Give:
reduced breakdowns
improved safety
restored lost output due to faults
better uptime
Repowering Can Give:
stronger long-term output
fewer recurring failures
easier maintenance (newer parts)
improved plant life
Actual improvement depends on the plant’s condition, site environment, and what exactly is upgraded.
Simple Decision Checklist (Use This)
If you answer YES to most of these, choose Revamping:
my plant is okay but has small faults
repairs solve issues and output improves
inverter trips are occasional
panel damage is limited
If you answer YES to most of these, choose Repowering:
output keeps dropping year after year
breakdowns repeat often
many panels are weak or damaged
inverter spares are not available
plant feels outdated and costly to maintain
FAQs
1) Which is better: repowering or revamping? It depends. Revamping is better for fixable faults. Repowering is better when the plant needs major upgrades for long-term improvement.
2) Can I do revamping first and repowering later? Yes. Many plant owners revamp first, then repower later if major issues remain.
3) Do I need approvals for repowering? It depends. If your plant capacity or grid-connection setup changes, approvals may be required. For like-for-like replacement, it may be simpler.
4) How do I know my plant needs repowering? If generation keeps dropping, downtime is high, and faults repeat even after repairs, repowering may be the right option.
If your solar plant is old and the power generation is not like before, you’re not alone. Many solar plants start producing less electricity after a few years because parts get weak, dust problems increase, wiring becomes loose, or inverters start giving faults.
Repowering is the solution when normal maintenance is not enough.
This blog explains repowering in simple words, so anyone can understand.
What Does “Repowering” Mean?
Repowering means upgrading an old solar plant to improve electricity production and reduce breakdowns.
It’s like this:
If your bike is not running well, sometimes you service it.
But if the engine, tyres, and parts are old, you replace important parts to make it run like new.
Same way, when a solar plant becomes old, repowering means: replacing or upgrading important parts so the plant works better for many more years.
Repowering vs Normal Repair (What’s the Difference?)
Normal Repair / Maintenance
This includes:
cleaning panels
tightening loose connections
fixing small faults
replacing small damaged parts
This helps, but only up to a limit.
Repowering
Repowering is bigger than normal repair. It may include:
replacing old panels with better panels
changing old inverters
upgrading DC/AC wiring and protection boxes
improving monitoring system
Repowering is done when the plant needs a “major upgrade”.
When Do You Need Repowering?
You may need repowering if you notice these common problems:
1) Your plant generation is reducing every year
Even after cleaning, output stays low.
2) Inverter problems are happening often
inverter trips
frequent shutdowns
error alarms
long downtime
3) Panels are damaged or weak
hotspots (heating in one part of panel)
cracks
yellowing
water inside panel junction box
4) Wiring and connectors are aging
loose joints
burnt connectors
damaged cables due to sunlight or rats
5) Structure has rust or loosening
bolts are loose
structure rusting
alignment not proper
If these problems repeat again and again, then repowering becomes a smart decision.
What Parts Can Be Upgraded in Repowering?
Here are the most common upgrades in an old solar plant:
1) Solar Panel Upgrade
Old panels may be low wattage (example: 250W/300W). New panels produce more power in the same area.
Panel replacement is done when:
too many panels are weak or damaged
output is low even after cleaning and checks
2) Inverter Replacement
Inverters are like the “brain” of the solar plant. When they get old, breakdowns increase.
Inverter replacement helps when:
frequent faults happen
spare parts are not available
efficiency is low
3) DC Side Improvements (Wiring, Strings, Connectors)
Many plants lose power due to:
loose joints
damaged DC cables
mismatch in strings
old connectors
Fixing these improves output and reduces heat losses.
4) Combiner Boxes & Safety Protection
Old combiner boxes or protection devices can cause failures.
Upgrades may include:
better SPDs (surge protection)
improved fuses and terminals
better sealing against rain/water
5) Monitoring System Upgrade
In many older plants, monitoring is weak. You don’t know which string or inverter is causing loss.
Upgraded monitoring helps:
find faults quickly
reduce downtime
maintain better performance
6) Structure Strengthening / Alignment
Even if panels and inverters are good, poor structure alignment can damage modules and reduce output.
Structure work may include:
rust correction
bolt replacement
rail leveling
row alignment
What Should You Do Before Repowering?
Before deciding repowering, check:
Compare current generation with earlier years
Check inverter fault history
Inspect panels for hotspots/cracks
Check DC wiring and connectors
Check structure rust and loosenings
Confirm if downtime is too high
A plant inspection helps decide whether you need:
small repairs only or
full repowering plan
FAQs
1) Is repowering only panel replacement?
No. Repowering can include inverter upgrade, wiring improvements, monitoring upgrade, and BOS improvements too.
2) Can repowering be done in stages?
Yes. Many plants do it step-by-step to reduce shutdown time.
3) Do I need approvals for repowering?
It depends. If the plant capacity or connection changes, approvals may be required. For normal replacements in the same setup, it may be simpler.
4) How do I know if my plant needs revamping or repowering?
If issues are small and fixable, revamping is enough. If problems repeat and output is continuously low, repowering is a better option.
Solar energy is a long-term investment — but like all technology, solar panels gradually lose efficiency over time. This performance drop is known as solar PV panel degradation, and understanding it is key to estimating how much energy your system will produce over its 25+ year life.
In this blog, we’ll explain what degradation means, provide a simple year-wise efficiency chart, and share ways to slow the decline and protect your ROI.
What Is Solar Panel Degradation?
Solar panel degradation is the gradual reduction in a solar panel’s ability to generate electricity as it ages. Factors like UV exposure, temperature changes, and environmental wear cause the panel’s materials to break down slightly each year.
While degradation is normal, it's important to choose panels with low annual loss and maintain them properly to ensure high energy output over decades.
Year-Wise Degradation Rate of Solar Panels
Most standard solar panels degrade at approximately 1% per year. This means they lose about 1% of their original capacity annually — though high-efficiency panels may degrade more slowly.
Estimated Solar Panel Efficiency Over Time
Year
Efficiency Remaining
Year 1
99%
Year 5
95%
Year 10
90%
Year 15
85%
Year 20
80%
Year 25
75%
Year 30
70%
Quick Math: A 100 kW solar system may produce around 90 kW by year 10, and 75 kW by year 25 — under the 1% per year degradation model.
What Causes Solar Panel Degradation?
Several factors contribute to a gradual drop in performance:
UV Exposure: Constant sunlight slowly wears out internal layers
Thermal Cycling: Repeated heating and cooling causes material fatigue
Moisture & Humidity: Leads to corrosion or PID (Potential Induced Degradation)
Soiling: Dust, pollen, and bird droppings accelerate wear
Mechanical Stress: Wind, poor mounting, or heavy loads may cause microcracks
How to Reduce Solar Panel Degradation
While degradation is inevitable, you can slow it down with smart choices and regular care:
Choose Tier-1 solar panels with proven durability and low degradation warranties
Install dust control windfences to reduce airborne particles
Keep panels clean with a regular cleaning schedule
Use strong mounting structures to reduce vibration and stress
Install PID-resistant modules in humid or coastal environments
Monitor system output regularly to detect underperformance early
Panel Types and Degradation Comparison
Panel Type
Typical Degradation Rate
Monocrystalline
~0.5% – 1.0%/year
Polycrystalline
~0.8% – 1.0%/year
HJT (Heterojunction)
~0.25%/year (very low)
TopCon (Next-gen mono)
~0.3%/year
Thin-film
~1.0% – 1.5%/year
If you're building a solar farm or commercial plant, choosing low-degradation technology like HJT or TopCon pays off long-term.
Even though solar farms are designed to be low-maintenance, technical issues can arise that significantly reduce performance, affect ROI, and increase downtime. Timely detection and resolution of these problems are essential for ensuring long-term efficiency and operational stability.
In this blog, we cover the most common technical problems in solar farms, their impact, and proven strategies to resolve or prevent them.
1.Inverter Failures
Problem:
Inverters are critical components that convert DC from panels into AC for grid use. Overheating, poor ventilation, or internal component degradation can cause frequent shutdowns or failures.
Resolution:
Use high-quality, properly rated inverters
Ensure adequate ventilation and dust protection
Perform regular thermal inspections to identify hotspots
Monitor inverter data remotely for performance anomalies
Tip: Always maintain spares for quick inverter replacement to reduce downtime.
2. DC Cable Degradation & Connection Failures
Problem:
Loose, oxidized, or damaged cables reduce power flow, increase resistance, and can even cause arcing or fire risks.
Resolution:
Conduct periodic visual inspections and thermal scans
Use UV-resistant and high-quality cables
Implement proper cable management and secure routing
Replace damaged connectors and seal joints to prevent moisture ingress
3. Soiling and Dust Accumulation on Panels
Problem:
Dust, pollen, bird droppings, and industrial residue block sunlight and reduce power generation by up to 30%.
Resolution:
Establish a scheduled cleaning plan (manual or robotic)
Install dust control windfences around solar arrays
Use anti-soiling coatings where applicable
Monitor cleaning intervals based on weather and output data
4. Shading from Vegetation or Nearby Structures
Problem:
Unexpected shadows from growing trees, fencing, or construction nearby can reduce string output or trip MPPT functionality.
Resolution:
Perform regular site inspections
Trim vegetation and remove temporary obstructions
Design layout using shading analysis tools
Utilize module-level power electronics (MLPE) to isolate shaded panels
5. Mounting Structure Corrosion or Loosening
Problem:
Over time, mounting frames may loosen or corrode, especially in coastal or high-humidity areas, risking panel alignment and safety.
Resolution:
Use hot-dip galvanized or anodized aluminum structures
Schedule torque checks on fasteners
Inspect for rust or corrosion and replace affected parts
Apply anti-corrosive coatings in high-risk zones
6. Energy Loss Due to Module Mismatch or Degradation
Problem:
Not all solar panels age uniformly. Mismatch losses occur when one or more modules degrade faster, pulling down the performance of the entire string.
Resolution:
Use flash-tested panels with matching electrical characteristics
Perform IV curve testing to detect underperforming modules
Consider bypass diodes or microinverters for improved isolation
Replace degraded panels periodically
7. Poor Monitoring and Lack of Data Visibility
Problem:
Without proper real-time monitoring, faults go unnoticed until major generation losses occur.
Resolution:
Implement string-level or inverter-level monitoring systems
Use cloud-based dashboards with fault alerts
Analyze data trends monthly to catch slow degradation
Train teams to interpret and respond to alerts proactively
8. Ground Faults and Earthing Issues
Problem:
Improper grounding leads to electric leakage, shock hazards, or fault trips, especially during rains.
Resolution:
Ensure proper earthing design compliant with local codes
Check resistance values regularly (less than 5 ohms is ideal)
Use ground fault detectors on combiner boxes or inverters
Test insulation resistance between live and ground terminals
9. PID (Potential Induced Degradation)
Problem:
PID causes gradual loss in panel performance due to high system voltage and humidity.
Resolution:
Use PID-resistant modules
Install PID recovery devices
Maintain system voltage below manufacturer thresholds